When I was working for a customer a while ago, they asked me if it was possible to modify the Wizard in MDT and of course I answered yes, since that is possible. They wanted many things and in this post I will cover the easy stuff. and that is reading from the existing environment and present it on screen during the deployment…
The requirements was pretty easy, something like…
-Could you help us to create a extra page in the wizard that will help the local tech to be able to see and verify that everything is correct when he is deploying the machine?
-You mean something like this?
-Yes, that would be ok, thank you.
Adding a Deployment Runtime Environment page in the Wizard
So, maybe you would like to do this on your own, and here is how you do:
- Download the Wizard Editor from http://mdtwizardeditor.codeplex.com/
- Create a backup of “DeployWiz_Definition_ENU.xml” (it is in the scripts folder in your deployment root folder)
- Open \scripts\DeployWiz_Definition_ENU.xml using the Wizard Editor
(It should look similar to this)
- Select Deployroot
- Click Add (left side in wizard, far down)
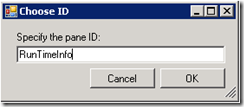
- Create a new “Pane ID” and call it “RunTimeInfo”
(It should look something like this)
Now when you have created the new Wizard page (with the amazing context of “Hello world”) you need to “fill” that page with some good information, and here it is:
-HTML-
<h1>Deployment Environment Information</h1>
<table border=”1″ cellspacing=”1″ cellpadding=”1″ width=”650″ align=”center”>
<tbody>
<tr>
<td width=”300″ align=”right”><em>IP Address (ipaddress001)</em></td>
<td><input style=”width: 340px” name=ipaddress001 readonly/></td>
</tr>
<tr>
<td width=”300″ align=”right”><em>Default Gateway (DefaultGateway001)</em></td>
<td><input style=”width: 340px” name=DefaultGateway001 readonly/></td>
</tr>
<tr>
<td width=”300″ align=”right”><em>Deployment root (Deployroot)</em></td>
<td><input style=”width: 340px” name=Deployroot readonly/></td>
</tr>
<tr>
<td width=”300″ align=”right”><em>WDS Server (WDSSERVER)</em></td>
<td><input style=”width: 340px” name=WDSSERVER readonly/></td>
</tr>
<tr>
<td width=”300″ align=”right”><em>Log Share (SLShare)</em></td>
<td><input style=”width: 340px” name=SLShare readonly/></td>
</tr>
<tr>
<td width=”300″ align=”right”><em>Log Share (SLShareDynamicLogging)</em></td>
<td><input style=”width: 340px” name=SLShareDynamicLogging readonly/></td>
</tr>
<tr>
<td width=”300″ align=”right”><em>Backup Share (BackupShare)</em></td>
<td><input style=”width: 340px” name=BackupShare readonly/></td>
</tr>
<tr>
<td width=”300″ align=”right”><em>Userdata Share (UDShare)</em></td>
<td><input style=”width: 340px” name=UDShare readonly/></td>
</tr>
<tr>
<td width=”300″ align=”right”><em>WSUS Server (WSUSServer)</em></td>
<td><input style=”width: 340px” name=WSUSServer readonly/></td>
</tr>
<tr>
<td width=”300″ align=”right”><em>BuildAccount (UserDomain\UserID)</em></td>
<td><input style=”width: 110px” name=UserDomain readonly/>\
<input style=”width: 110px” name=UserID readonly/></td>
</tr>
<tr>
<td width=”300″ align=”right”><em>JoinAccount(DomainAdminDomain\DomainAdmin)</em></td>
<td><input style=”width: 110px” name=DomainAdminDomain readonly/>\
<input style=”width: 110px” name=DomainAdmin readonly/></td>
</tr>
</tbody>
</table>
-HTML-
Copy the text between the two –HTML- parts in the text and paste it into the HTML tab in the Wizard, it should look like this when your are done.
And if you click the Preview tab you will see this:
There is one thing left and that is “condition”, we would like to set condition for this page, so what about this as a condition?
ucase(Property(“SkipRunTimeInfo”)) <> “YES”
It basically means that if SkipRunTimeInfo is set to YES, it should not show and that should work just fine for us.
Switch over to the “Settings” tab and paste that in and your are almost done
If you would like to test the wizard, just go ahead and use the” Wizard – Test” menu in top of the editor.
The only thing you need to do is to add the new property we added, the “SkipRunTimeInfo to the Properties in the Rules file (customsettings.ini)
Like this
And now you are done.
You might ask your self if it is possible to get other kind of information into the wizard pane, and yes, that can be done. This time it was the easy part, just reading the information from the environment we already have and just show it, next time, it will be a bit more fun..
Mike
Categories: Deployment


Great post. I am waiting for your next one. Also, could I suggest showing a modification of an existing pane? For example, I hope to investigate soon, how to comment out the OU on the DomainMembership pane.
Would I be able to use this wizard if I need to migrate to a different machine, different domain? We are migrating to domains (trusted) and my MDT 2008 and 2012 machines are on the two trusted domains and i need them to work on the new one. I also wonder if my machine dies if i could use my image backup to drop to another machine- or would it be easier just to back up the distribution point and edit files…..
I need help amendeding ComputerName and DomainMembership, can anyone help!
What I want is for Computer name, have either a radio button or a drop box box with 3 difference departments, like Sales, Marketing, IT and then when a department is selcted part of the computer name field gets populated.
Can anyone tell me what code I need to edit for thi?
And for DomainMembership I want to add some paths to OU in a drop down box instead of having to manually enter it,
Any one!
Thanks
Mike
That can be done by modifying the Wizard, I have a sample that is almost ready to be published, hang on.